.webp)
Does VEO in Google Ads live up to the hype?
Google recently announced a new feature within Google Ads that utilizes VEO to turn static image ads into usable videos, but does it really do what it says it does?
Our take here at ZATO? It’s pretty cool, but leaves a lot to be desired (still) in the final product. Let’s call it a work in progress! That being said, it’s worth testing and seeing for yourself, so here’s our walkthrough:
What is Google's VEO?
It’s pretty obvious that Google has been pushing video ads for quite some time. And it’s no wonder that they desperately need more assets to monetize YouTube - which is still considered to be the second largest search engine in the world - after Google itself. Time and time again, advertisers have come back with the biggest hurdle to advertising on YouTube being building the creative assets themselves. Not every company can afford a creative team and a camera crew.
Google has provided some solutions to this problem. First, select advertisers were given access to Google’s own creative team to build a video ad. These weren’t much better than what we see in the Performance Max automatically created videos, but they were something. Now, as AI has evolved, Google has given us another tool available to all advertisers in the UI of Google Ads itself - a version of VEO (their gen AI model that creates videos) that takes two static image ads and creates a 10 second video out of them.
How to Find and Use VEO
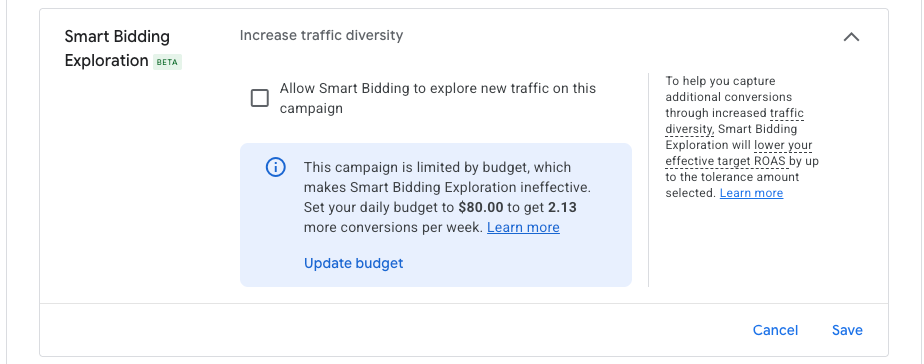
This stand-alone tool is available within Google Ads in the Asset Studio. This can be found under tools > asset studio (which is the first menu category at the top under the tools menu). From here you will see many options to utilize AI to create both image and video assets, but for the purposes of this article, let’s focus on the “create video from images” section. You may have to scroll down to find this.

Once you select this option, you will see that you have to provide source images on the left hand side.
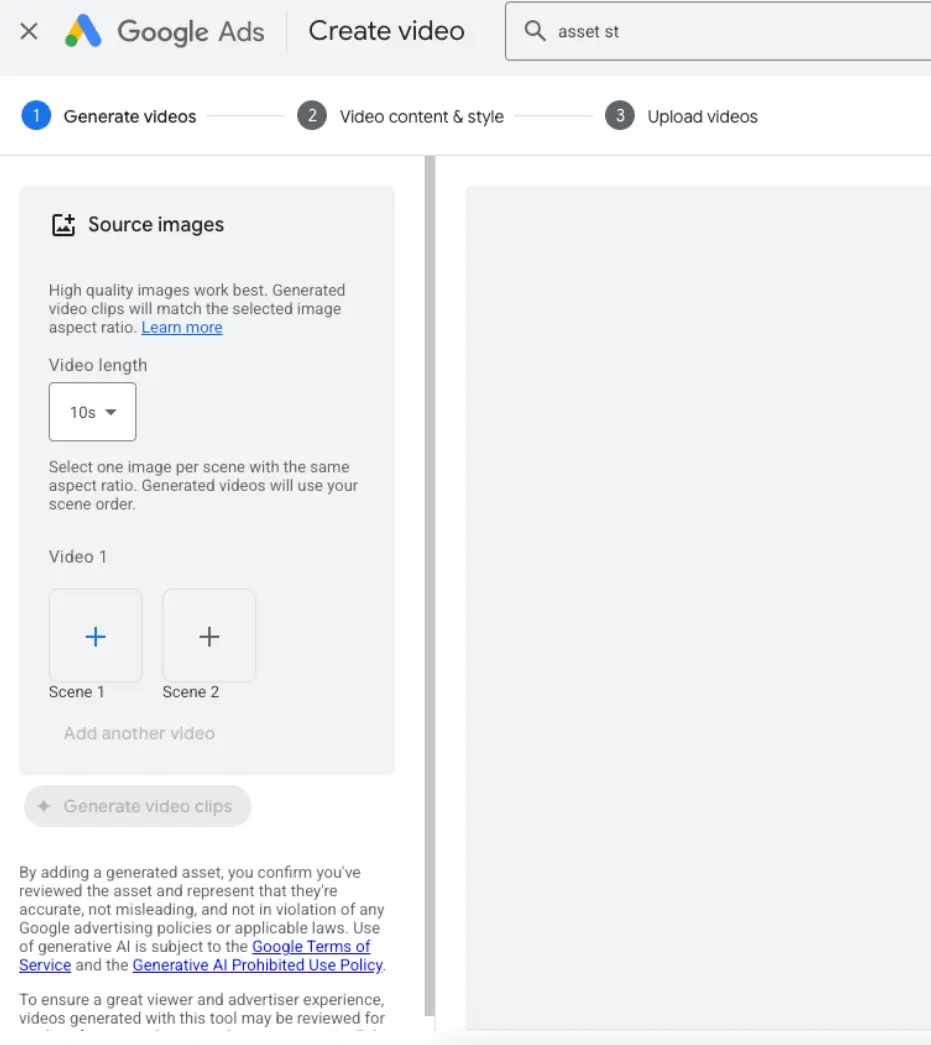
There is also a dropdown for video length, but unfortunately, at the time of this writing this only populates 5 or 10 seconds.
When you click the + button next to the scene, your asset library will popup and you will be prompted to select one picture for scene one.
When selecting images for the scenes, keep in mind that text will show up on top of these images, so you will not want to select a busy image or one with text already. You also do not want to select your logo yet - there is another section with which to do that.
You will have to repeat this process to select a photo for scene 2 before the “generate video clips” button becomes available.

There may be some trial and error when selecting images and generating video clips. We’ve gotten quite a few errors on our end at times as the program does not play nice with certain pictures and will not generate a video clip from images that contain certain content.
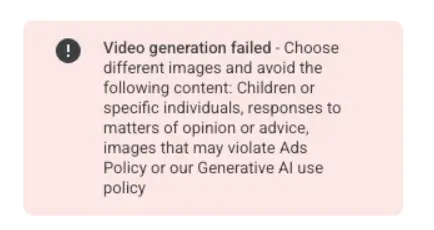
After a few attempts, I was able to successfully create a video of burning money and someone typing on a keyboard. In the instances I’ve experimented with this tool, it will either create motion within the picture or showcase the image in the picture from different angles.
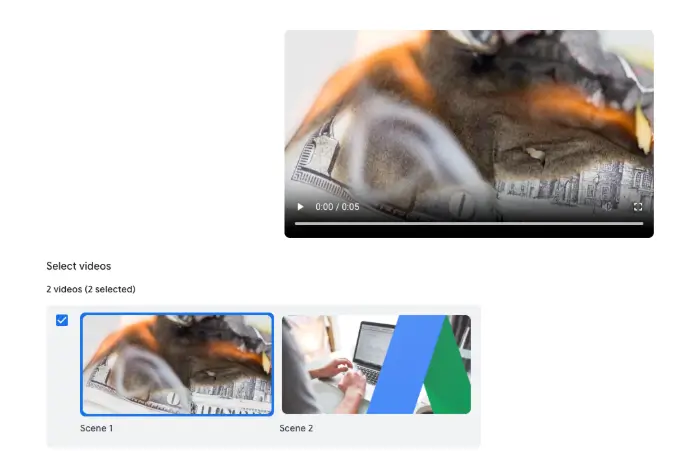
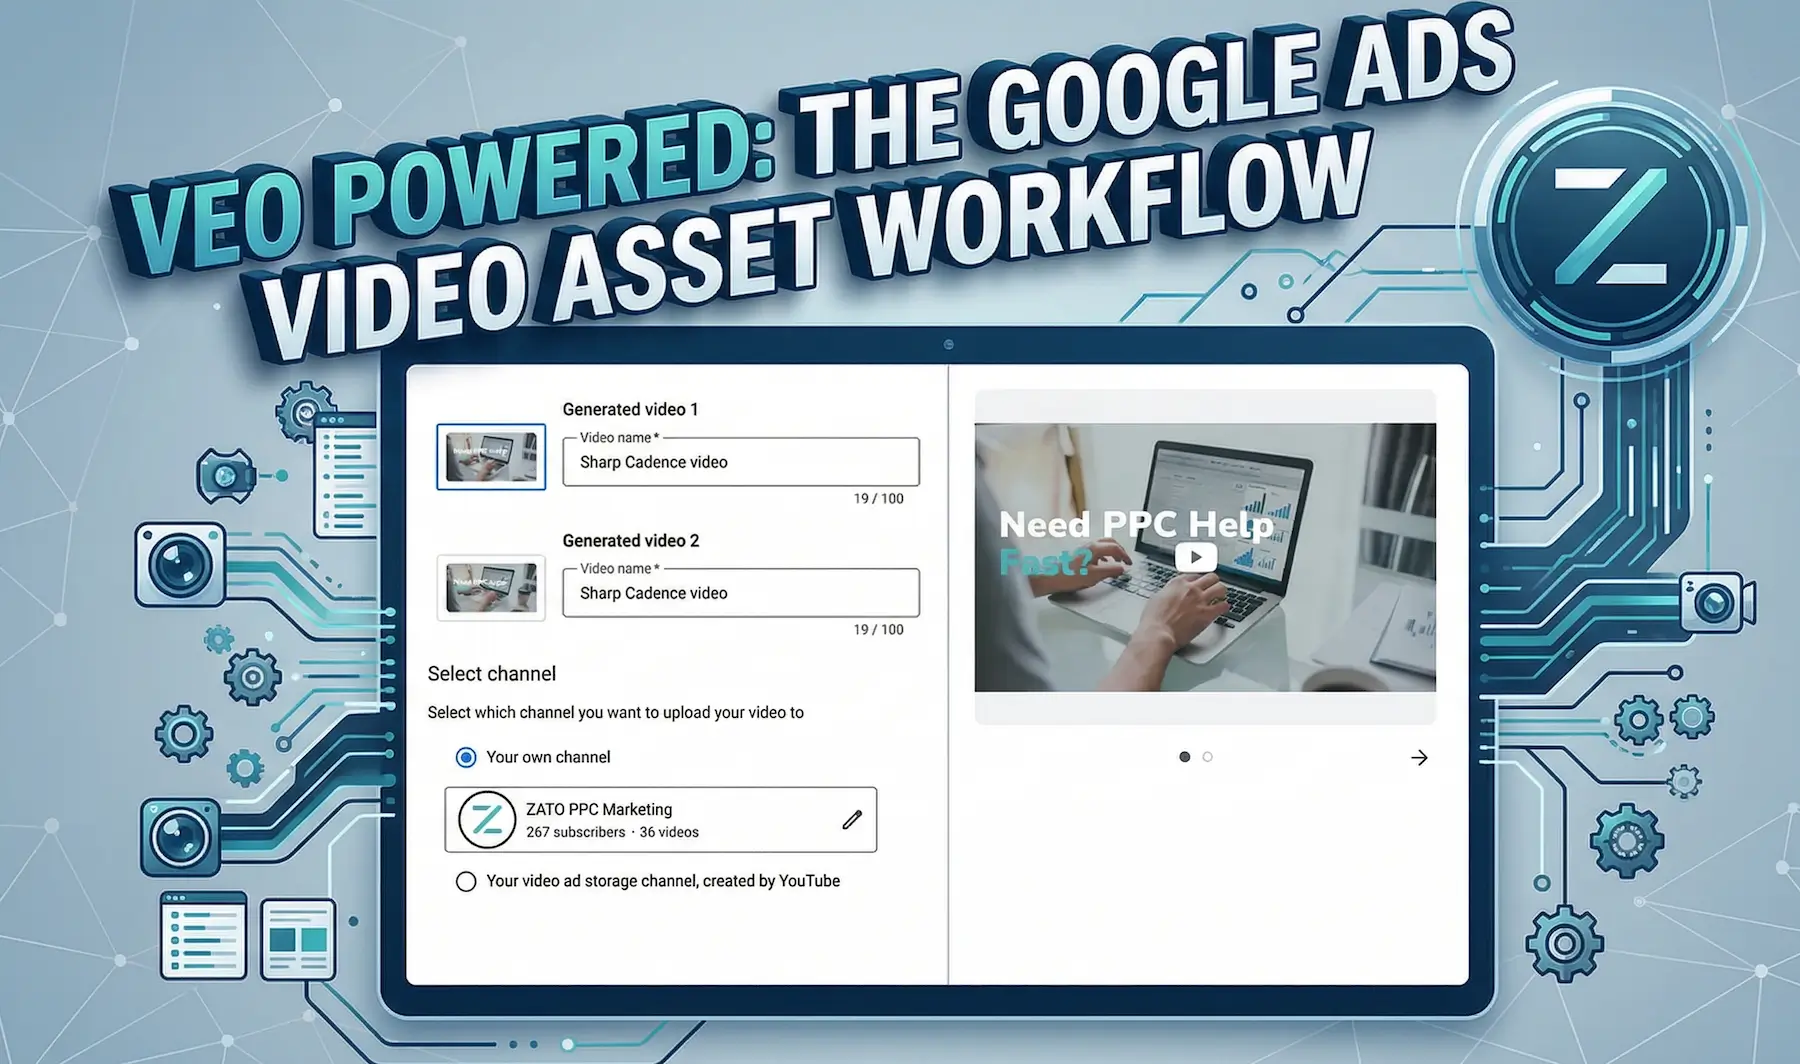
Another confusing aspect of this tool, is the fact that it apparently creates two separate videos that are nearly identical.

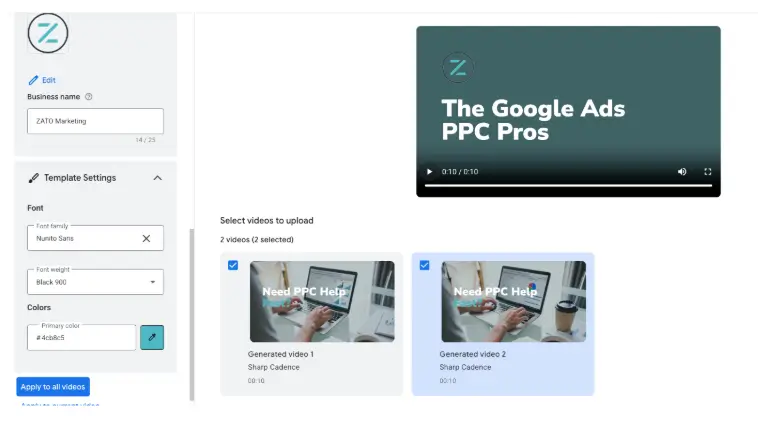
Once you’ve selected the videos you want to continue with, hit the blue button “use selected videos” at the bottom and you will be directed to the next screen. This screen is where you will choose a template and add your marketing messages.
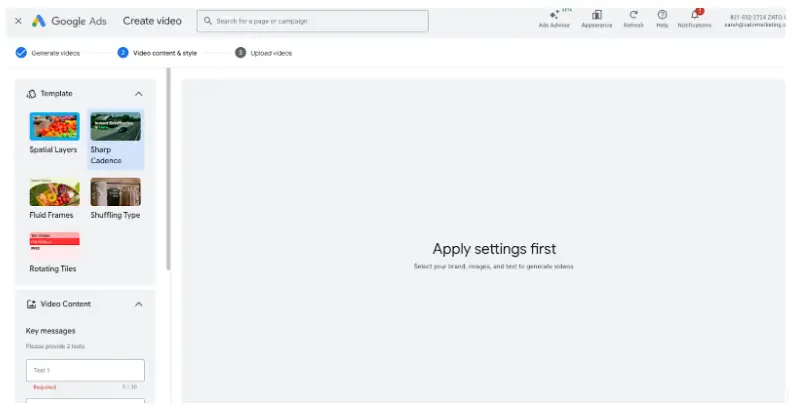
You can hover over each template and it will provide you with a brief motion example of what to expect when selecting it. I went with “sharp cadence” for this example.
The two “key messages” give you 30 characters each. I don’t recommend using your business name in these as that will be shown at the beginning of your video and is entered in the last field in this section.
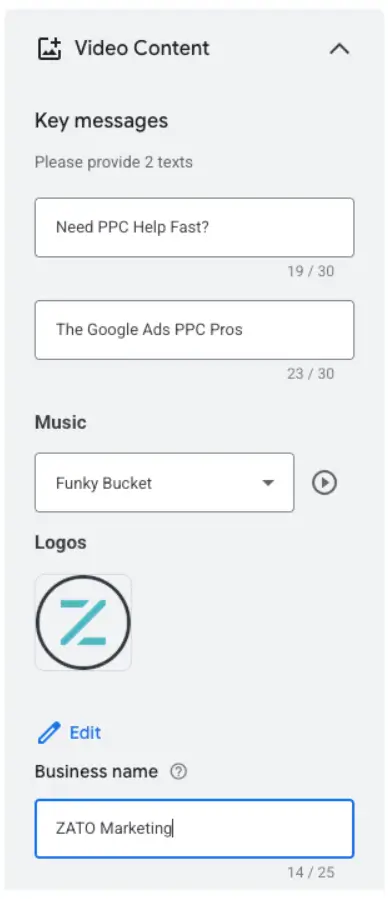
I also don’t recommend using “Funky Bucket” as the music for your ad. You’re just going to have to trust me on this one. You can expand the music section and listen to samples of each of the tunes offered.

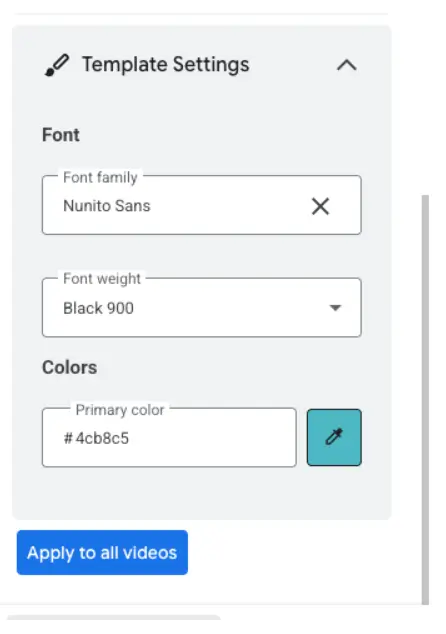
The template settings at the bottom allow you to choose which font and primary color you’d like for your ads.
From the next screen, you can view your created videos and make tweaks before you upload them.
When you select “save and upload videos” you have the option of saving them to your own channel or an ad storage channel. You may be familiar with ad storage channels if you’ve used the earlier versions of the video editor within the UI.

From there, the videos are also saved to your asset library where you can immediately use them in your YouTube, Demand Gen or Performance Max campaigns.
Now, are these the best videos ever? No - not even close. If you have access to a creative team and a camera crew then definitely opt for those first. However, for advertisers in a pinch, this could be a helpful jumping off point - especially if the right static image assets and marketing text is available. If you are wanting to expand to video without the risk, using this in-platform tool is a very low risk option to do so as long as you do not have high expectations.